 Isn’t it so hard to decide? Well time to be informed!
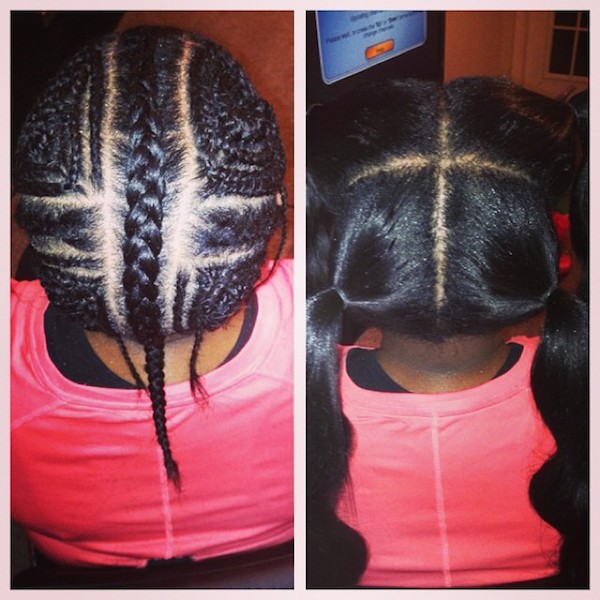
Middle Part
How to – this is the type of sew-in that is braided from the middle. In fact, it’s braided exactly how it’s styled. Using kanekalon hair, the hair is braided from the middle to both sides. Then the back of the hair is braided down to the neck. The tracks of the weave should be sewed in the pattern of the braids. The middle of your natural hair should be out for more of a natural look. However; it is possible to not have any natural hair out but the track will be seen, giving the sew-in an unnatural look. To avoid that, weave can be bought specifically with no tracks at your local beauty store. Weave like that has a specific method with specific glue therefore if you’re a beginner, avoid using it. Practice it first

The braiding pattern of the middle part sew-in
Pros – With your natural hair out, this style could look authentic and as if it weren’t weave. Plus, this style works for almost every type of weave including Yaki, Brazilian or even Indian weave.

A close up of the weave sewn in.
Cons – There aren’t too many ways to style this hair. To avoid showing tracks, the hair must stay in the middle part style which can get restricting and boring. Also, if you decide to leave your natural hair out, you may end up damaging it trying to keep to match the weave you sewed in. If you get a texture of weave that matches your hair texture, then that can be avoided.

The finishing of the middle part sew-in.
Side Part
How to – This style is very similar to the middle part. The only difference is that the braiding pattern is to the side. First, part the hair to the side you prefer. If you decide to have the hair to the left side, then braid the kanekalon hair to the left side. If you have more than 4 inches on the right side, then braid the hair to the right side. If not, then braid the hair to the back. Braid the bottom half of your hair back and then sew the tracks in the pattern of the braids. Your natural hair can be left out but weave with no tracks can be used as well.

Braid your natural hair to make it easier to style when the sew-in is finished!
Pros – This sew in looks very natural because the side part is less seen than what it be in the middle. This shows more of the weave than having the side part be the first thing seen in the hairstyle.
Cons – Though this sew-in has more style options than the middle part, the style methods are still limited to only 2-3 hairstyles.

This could be you after getting a side part sew-in
All Around the World
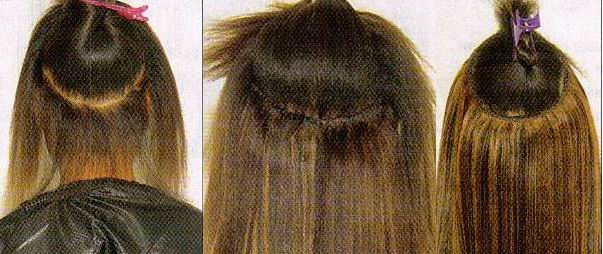
How to – This sew-in is just like it’s name. The braids are braided in an “all around the world style” meaning the braid begins in the center of the head and is braided in a swirl until there is no more hair left to braid. This will make your head look like a beehive BUT, the style will turn out great. Once the braiding is done, the weave is sewn in. Your natural hair can be left out but, if so, it should be left out at the perimeter of your hair to give your sew-in more styling options.

This is an alternative way of braiding. Instead of starting at the center of your head, you can end there.
Pros – When leaving your hair out, this style has a multitude of hairstyle options, my favorite being the ponytail options. This sew-in also can be worn down and works in any hair texture.

What the sew-in looks like after you start sewing
Cons – Because such little of the hair is left out, the hair can be damaged. In addition, when the perimeter of the hair is weakened, the visual part of the hair looks damaged which could make your natural hair and hairstyle look unattractive. Plus, having your hair damaged could make your hairline retract and make your forehand look bigger.

YAASSSS to that beehive sew-in!
The Vixen
How to – First, part your hair into four sections. Then, braid those four sections to be sewn in. Leave the perimeter of each section out. It sounds weird but trust me, it’ll all work out. Then sew the hair in the way it was braided, after that, you’re done!
Understand the four sections now?
Pros – this is my favorite hairstyle because of the amount of pros it has. Because so much of the hair is out, the style looks very natural and can be treated as if it were actual hair. Meaning that you can style the sew-in anyway you want.
Cons – Having this much hair out can make the natural hair to be damaged compared to the hair that’s braided. In addition, this style doesn’t look pleasant unless the weave matches your natural hair. The hair can also be damaged more easily if the weave doesn’t match the weave. The reason why is because one would have to incessantly curl or flat iron the natural hair for it to match with the weave, which is very unhealthy.

Style as you please!
Half Sew-in
How to – This style requires half of your hair to be out, or even a third of it out. To complete this style you must part the middle of your hair horizontally. You can choose how much of your natural hair you want to braid. If you want less of your natural hair out, then braid more than half of your hair. It is solely up to you. Braid the hair to the back so that the weave can be sewn to be worn down.
Half weave, half you (:
Pros – This style is a good way to corporate your natural hair. So if you want some added length to your hair, this sew-in is best for you. And if the back of your hair is in an unhealthy state, this sew-in could help give the hair strength to become more healthy. This style also has many alternative hairstyles.
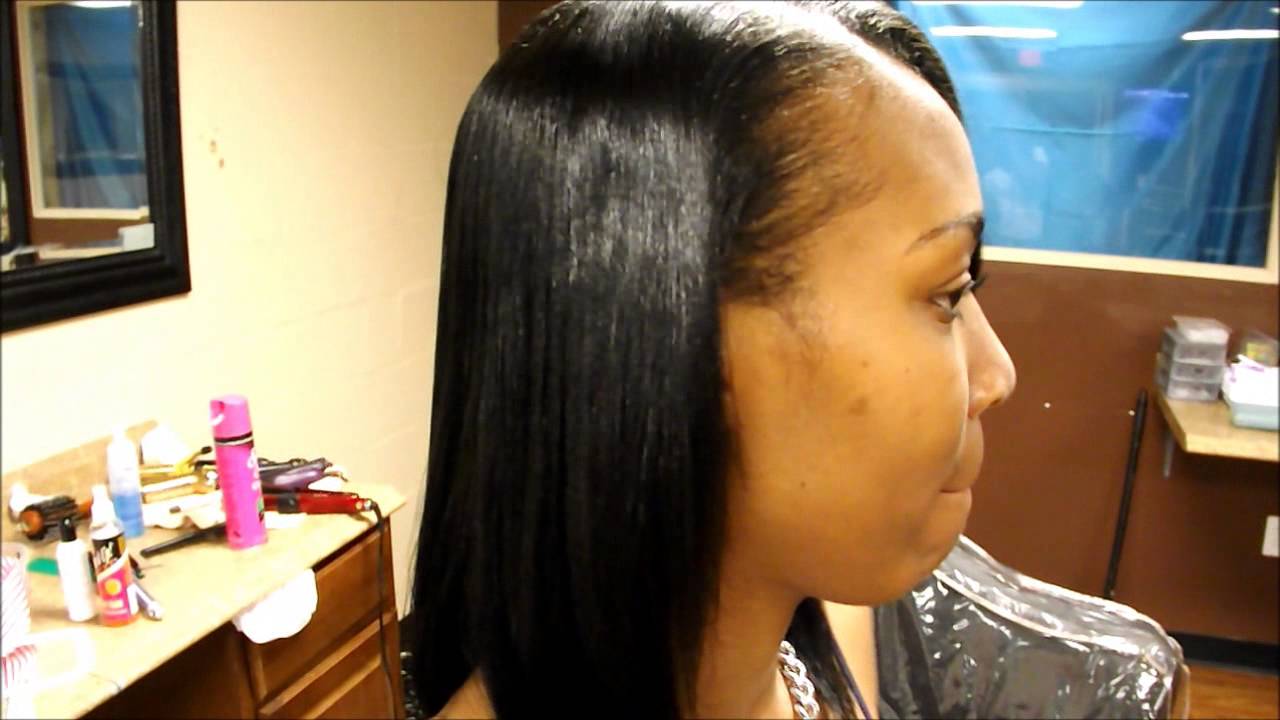
Doesn’t it look like it’s all of her natural hair?
Cons – If the front of your hair is damaged, this style won’t help and could even make it more damaged. This style may be hard to keep up with due to much of your hair being out.
What people will say when your sew-in is on point!